How we reduced our data generation times by 50%
A walkthrough of how we reduced the time it takes to generate data in Neosync by 50% + benchmarks.
April 10th, 2024

We've been seeing more and more customers use Neosync for data migrations across Postgres databases and I wanted to write up a quick blog on how others can do this and why using Neosync to do data migrations may make more sense than using something like pg_dump.
pg_dump is great tool and for a lot of use-cases, pg_dump your database and restoring it using pg_restore works just fine. But there are a few use-cases where it's not the best idea. Let's cover some of those now.
For large databases, pg_dump and pg_restore can be slow, especially over network connections depending on where you're outputting the pg_dump file. You need enough disk space to store the dump file(s). Neosync streams the data from the source to the destination so the size of the database isn't a constraint.
pg_dump supports dumping data frm older versions of Postgres to newer versions since Postgres is backwards compatible but you can't do the reverse. You might ask, why would I downgrade from a newer version to an older version? This happens more than you think. Whether it's a bug or a business specific reason, you may just have to rollback to an older version. In that case, if your versions mismatch, you might run into a problem.
Probably the most common reason we see users using Neosync for data migrations is that pg_dump isn't very flexible when it comes to selecting schemas, tables and filters. Since Neosync can subset data using SQL queries, we're seeing a lot of customers use it to selectively move some data. You can learn more about this here
Along with the partial migrations reason above, if you need to transform the data in any way before you insert it into the new destination, then you would need to do some pre- or post-processing of the data. Neosync makes this dead simple with transformers
When you pg_dump a database, you're exporting all of the data and metadata about that database. Which means that you now have a file with a lot of sensitive data laying around in an S3 bucket somewhere. Depending on your organization that might not be allowed especially depending on where the new database lives. If it's in another VPC, you'll need to a find a way to move that data from one VPC to another. This can bring up security and privacy questions.
In order to get started, you'll need a Neosync account. You can sign up for a free account here.
Once you're signed up, navigate to the Connections page on the top navigation bar and click on + New Connection.

Then select the Postgres connection and you'll be taken to the Postgres connection form.
Let's name our connection prod-db and then in the Connection URL field, paste in the connection string for you database. If you have database parameters such as hostname, port, database name, etc instead of a connection string, you can use the Host option in the form. Click on Test Connection to see validate your connection. You should see a modal pop up that tells if you we were able to connect to the database and permissions that we have.
Once that looks good, go ahead and repeat it for your destination database.
Now you should have two connections, 1 for your source and another for your destination.
The last step is to run a Data Synchronization to migrate the data.
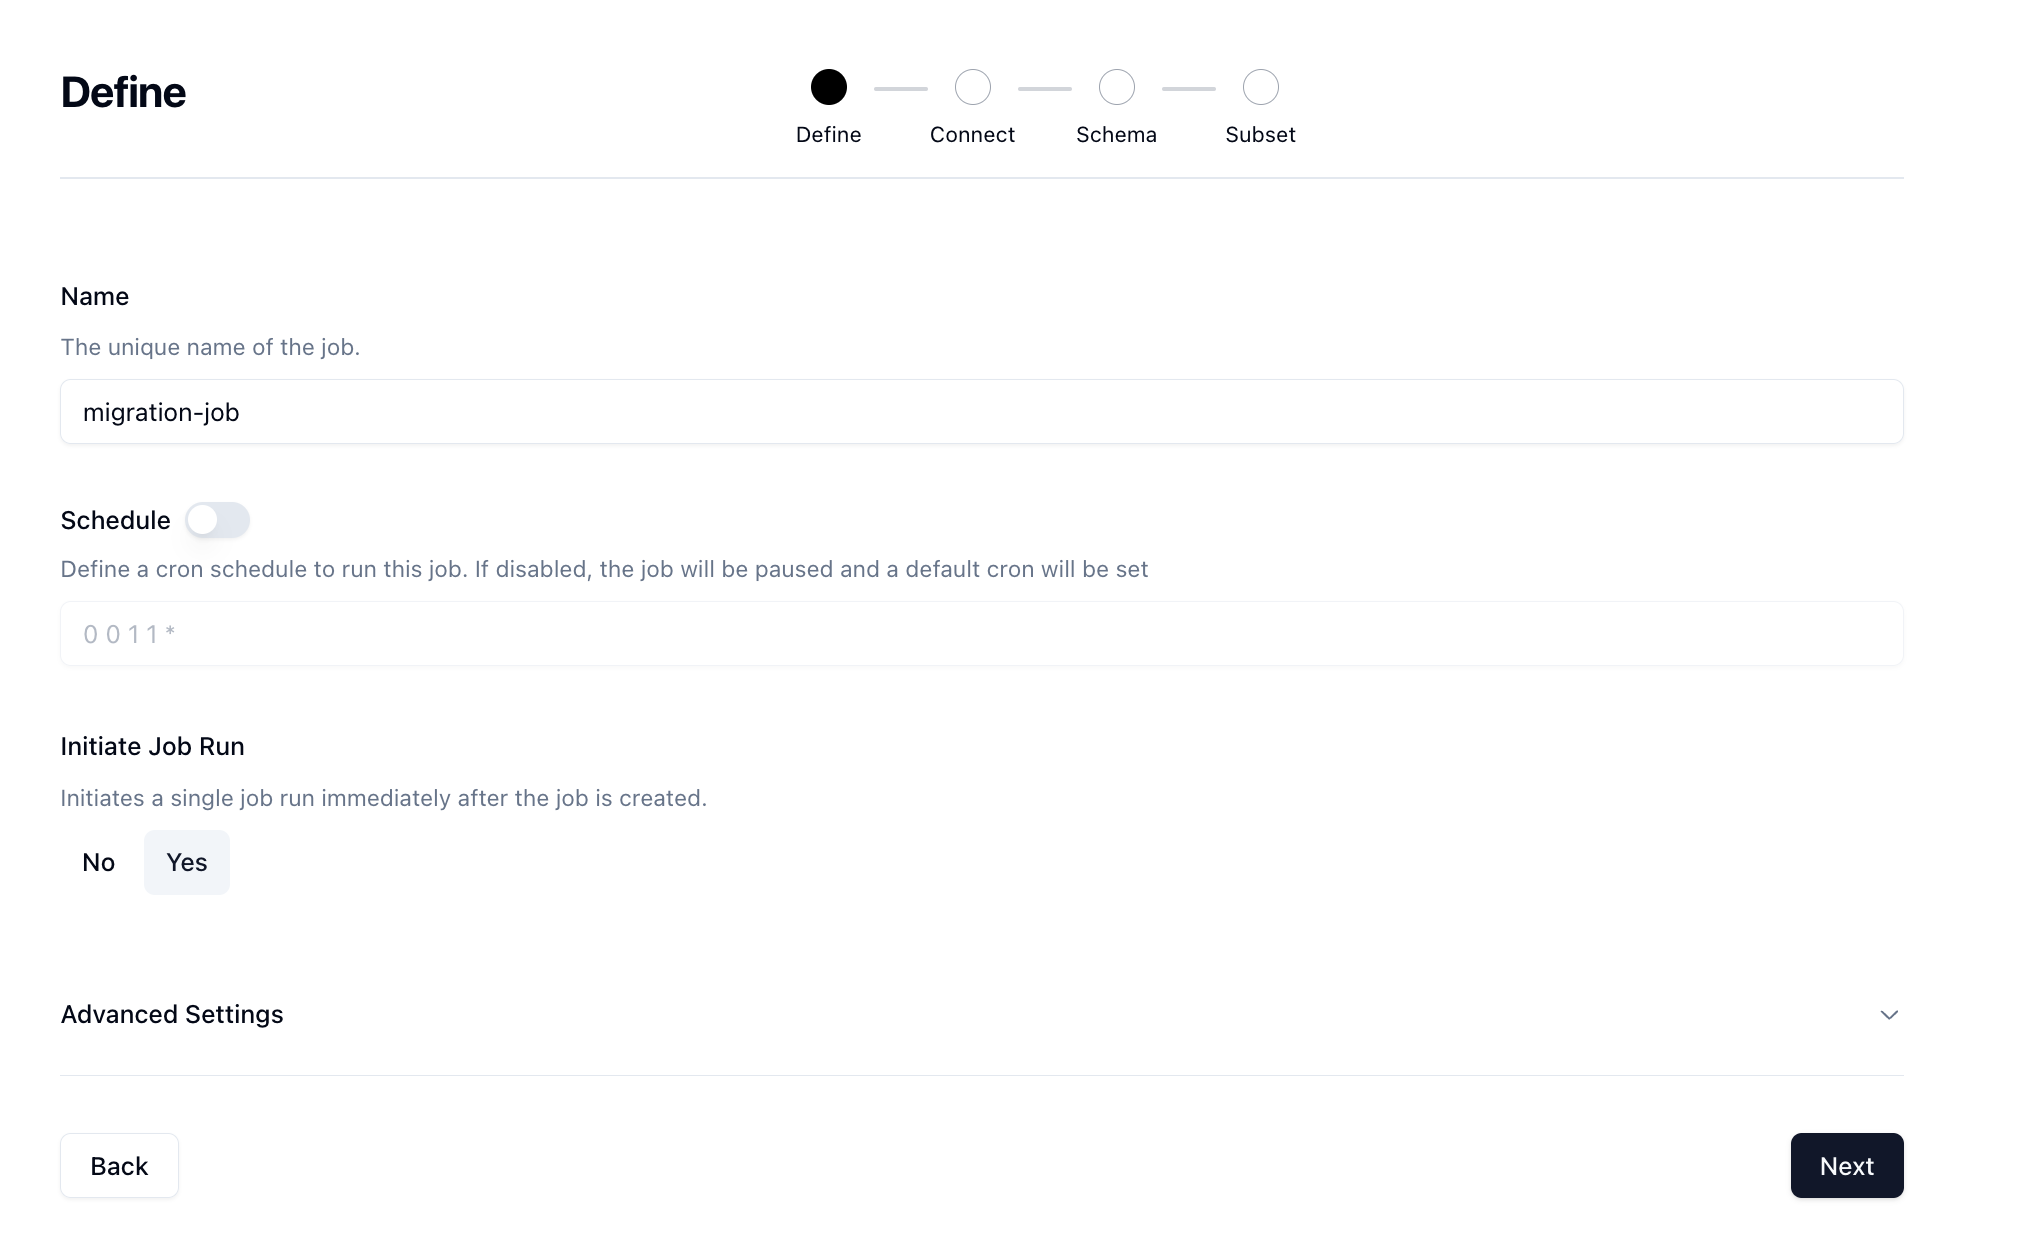
Jobs are how we configure and execute workflows to run and generate data or anonymize existing data. Click on Jobs in the top navigation menu and then click on the + New Job button. Select the **Data Synchronization ** job type and click Next.

Fill out the name of the job as well as set the Initiate Job Run to yes and click Next.
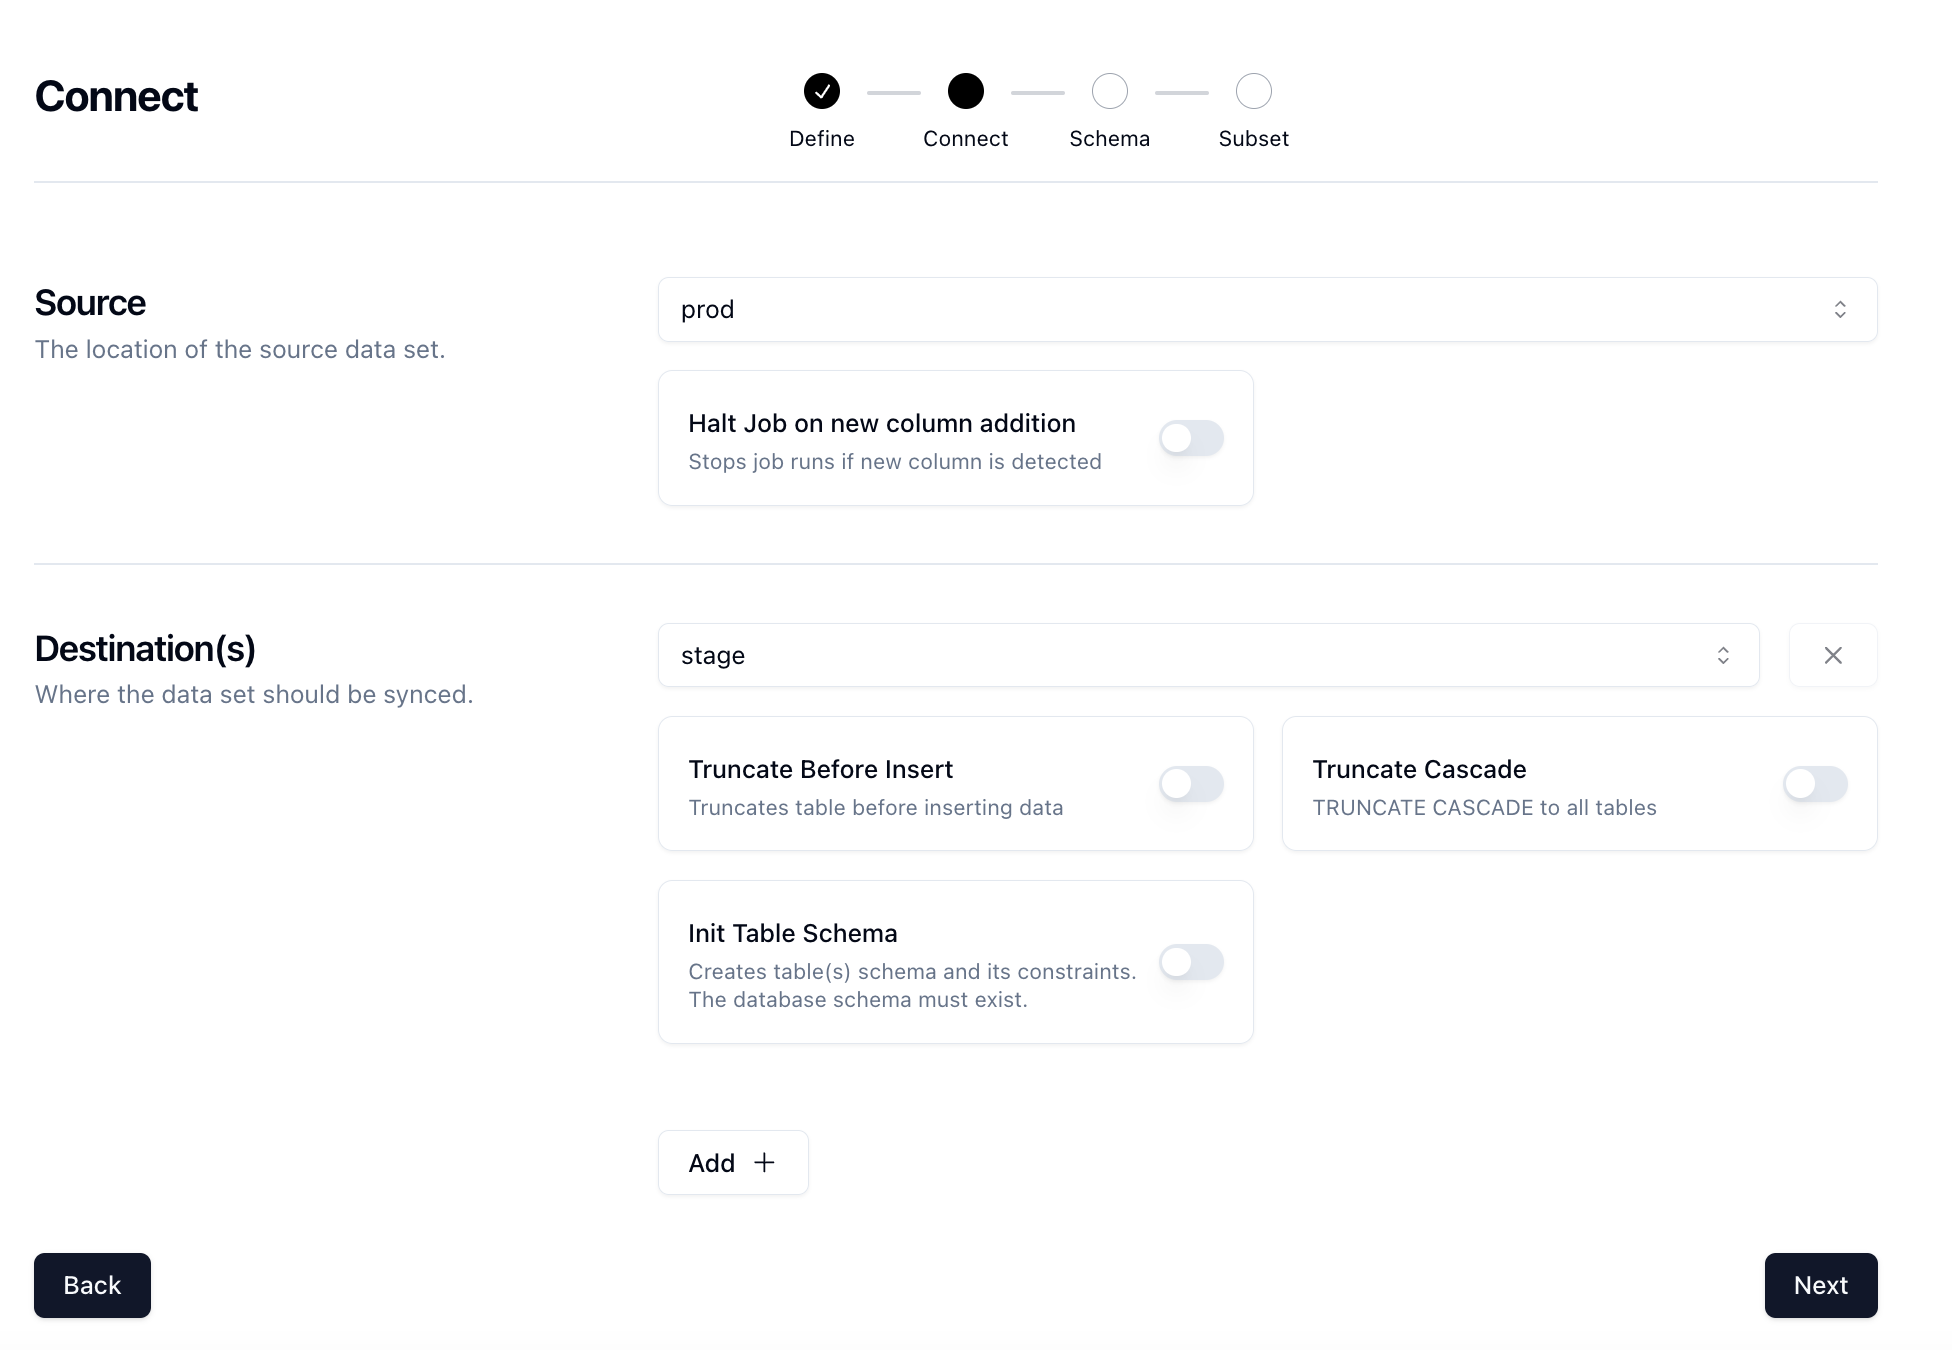
Next on the Connect page, set your source and destinations to the Connections that you configured earlier.

Click Next.
On the Schema page, you can configure any anonymization or synthetic data generation that you want to see happen. If you don't need to do any transformations, go ahead and click Next.
Lastly, is the Subset page. If you want to subset your date in any way, then go ahead and click on the Edit button for the table that you want to Subset and Neosync will handle the rest (including referential integrity!). Once you're satisfied with your subsetting click Submit to create and run the job.
That's it! Now the job will run and you'll be able to migrate data from one database to another.
In this blog, we went over how to use Neosync to easily migrate data from one Postgres database to another. There are many ways that you can migrate data across databases but depending on your security, privacy and operational requirements, Neosync can be a great "easy button".

A walkthrough of how we reduced the time it takes to generate data in Neosync by 50% + benchmarks.
April 10th, 2024

A walkthrough tutorial on how to integrate Neosync with OpenAI to generate synthetic
April 4th, 2024
